This guide walks you through installing and playing the Windows build of Yandere Simulator on a 64-bit Linux system in 2026 using Lutris and the Wine runner. The recommended approach here is to add the game as a locally installed game in Lutris and run it with a Lutris Wine runner (often switching to a newer compatibility-focused runner after the first launch).
You will:
- Download and extract the Windows build of the game
- Create a dedicated Wine prefix folder
- Add the game to Lutris manually (local install)
- Do a first launch, then switch Wine runners (common compatibility trick)
- Learn the basic workflow for launching and updating the game
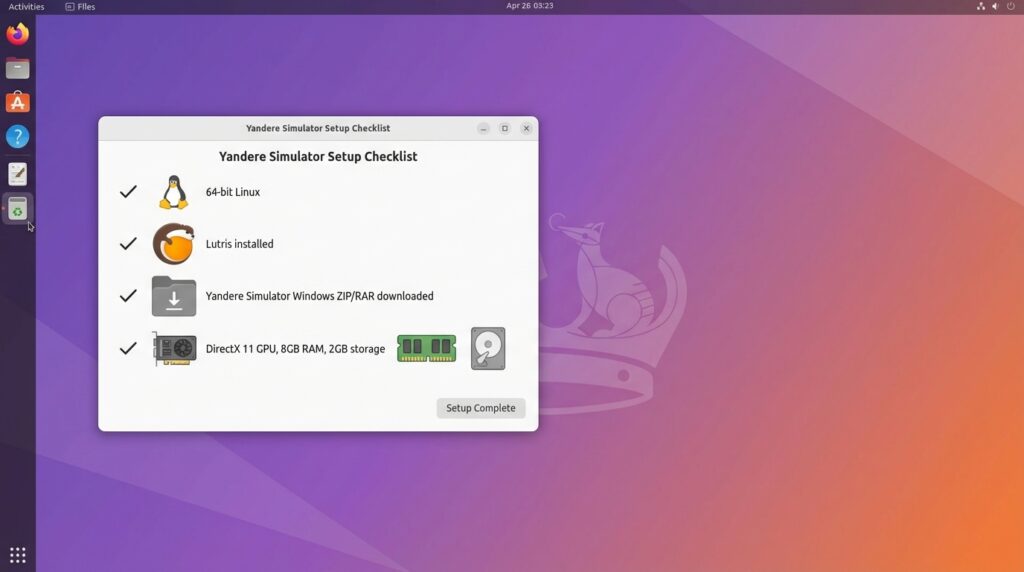
Step 1: Prepare What You Need (Before Starting)
This step ensures you have the minimum hardware/software prerequisites and the correct game download ready. Doing this first prevents most setup issues later (missing runners, wrong game build, insufficient system resources).
What you need:
| Requirement | Details (from the guide sources) |
|---|---|
| Linux system | 64-bit Linux OS and “modern PC” level hardware |
| Hardware baseline (Windows reference) | At least 8 GB RAM, ~2 GB storage, DirectX 11–compatible GPU (example: GTX 1060 2 GB VRAM) |
| Lutris | Installed via Flatpak or your distro package manager |
| Game files | The Windows build of Yandere Simulator downloaded as a ZIP/RAR from Yandere Dev’s download page (Lutris notes: “Download before using this installer”; Mega or Mediafire recommended) |
Actions:
- Install Lutris (Flatpak or distro package is fine).
- Download the latest Windows build archive (ZIP/RAR) from Yandere Simulator’s download page referenced by the Lutris entry.
Common mistakes / notes:
- Using the wrong build format: this method assumes you have the Windows build as a ZIP/RAR archive.
- Skipping the manual download: the Lutris page note “Download before using this installer” means you should have the archive already downloaded locally before continuing.
- Underestimating hardware needs: the Windows reference requirements (8 GB RAM, DirectX 11 GPU) are a practical baseline to keep in mind for Linux/Wine use.
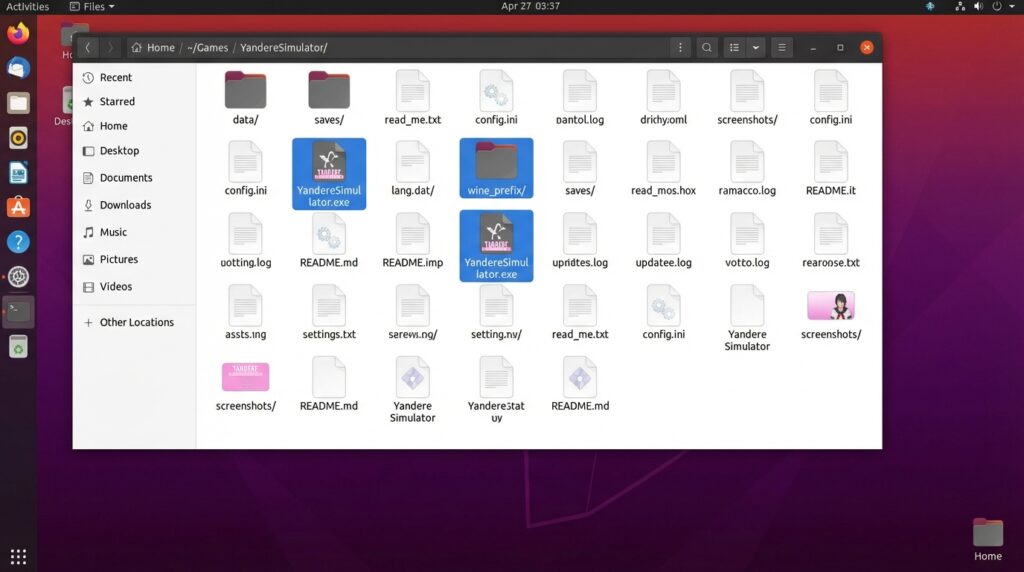
Step 2: Download and Extract the Game
This step puts the game files in a folder you control and creates a dedicated Wine prefix directory. Keeping everything organized in one place makes Lutris configuration easier and helps with future updates.
Actions:
- Download the latest Yandere Simulator build “latest.zip” from the download page https://www.yanderesimulator.org/download/.
- Extract the archive into a folder you control, for example:
~/Games/YandereSimulator/ - Confirm the folder contains the game executable:
YandereSimulator.exe - Inside that same folder (or next to it), create a Wine prefix folder, for example:
wine_prefix/
Common mistakes / notes:
- If Lutris can’t start the game later, double-check you extracted the archive fully and that YandereSimulator.exe is actually present in the folder you plan to use.
- Keep the Wine prefix folder clearly named (like wine_prefix/) so you don’t accidentally point Lutris at the wrong directory.
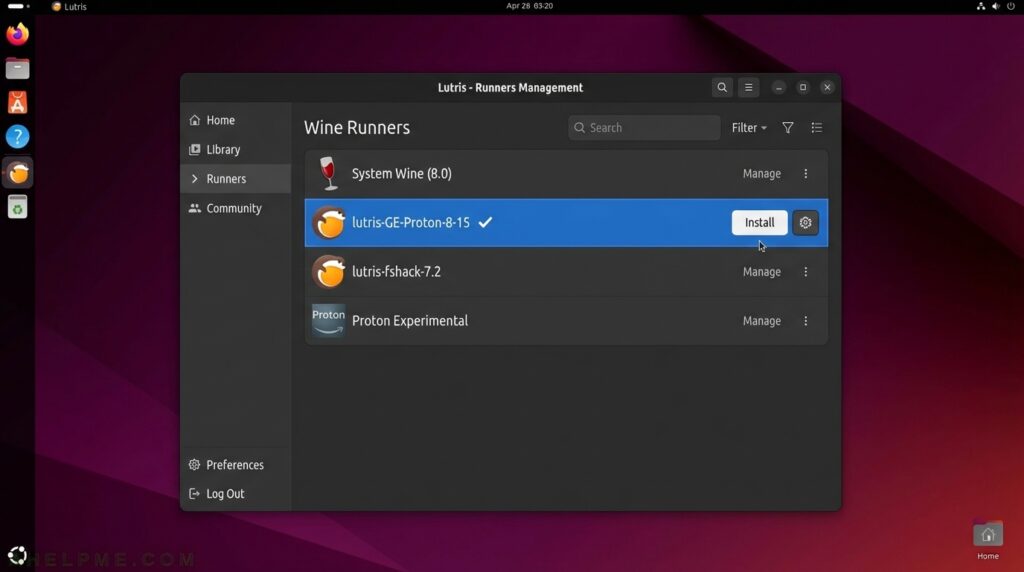
Step 3: Install Lutris and a Good Wine Runner
This step ensures Lutris is installed and has a Wine runner available. Lutris uses “runners” (different Wine builds) to improve compatibility, and many users choose a compatibility-focused runner for better results.
Actions:
- Install Lutris using either your distro repositories or the Flatpak version.
- Open Lutris and install a Wine runner if you don’t already have one.
- Optional but commonly helpful: install a compatibility-focused runner such as lutris-GE-Proton, then plan to select it later in the game’s Runner Options.
Common mistakes / notes:
- Forgetting to install a Wine runner: Lutris needs a Wine runner available before a Wine-based game can run.
- Not realizing you can change runners later: you can switch Wine versions after the first launch (covered in Step 5).
Step 4: Add Yandere Simulator to Lutris (Manual / Local Install)
This step creates a Lutris entry that launches the game using the exact executable and Wine prefix you prepared. This is the recommended method in this guide: Add locally installed game and run it with a Lutris Wine runner.
Actions:
- Open Lutris.
- Click the + button.
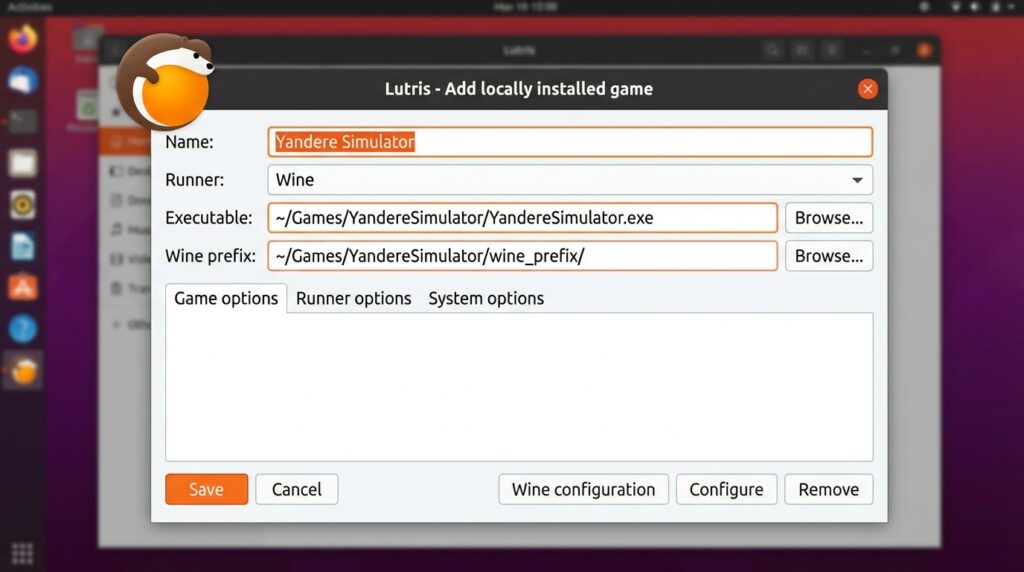
- Choose Add locally installed game.
- In Game info:
- Name: Yandere Simulator
- Runner: Wine
- In Game options:
- Executable: point to your extracted YandereSimulator.exe
- Wine prefix: point to the wine_prefix/ folder you created
- In Runner options:
- Select a Wine version/runner you installed (you can change it later).
- Click Save.
Common mistakes / notes:
- Wrong executable path: ensure you select YandereSimulator.exe from the extracted folder (not the archive file and not a different executable).
- Wrong Wine prefix path: ensure the prefix points to your dedicated wine_prefix/ folder (not the main game folder unless that is exactly where you created the prefix).
- If you move the game folder later, you must update the executable path in Lutris to match the new location.
Step 5: First Launch, Then Switch Runner (Common Compatibility Trick)
This step uses a practical workflow: run the game once, exit, then switch to a newer or compatibility-focused Wine runner (such as lutris-GE-Proton) in the game’s Runner Options. Many users find this improves compatibility.
Actions:
- In Lutris, select Yandere Simulator and click Play.
- Let the game start once.
- Exit the game.
- Open the game’s configuration/settings in Lutris.
- Go to Runner options.
- Switch the Wine version to your installed lutris-GE-Proton (or another newer/compatible runner you installed).
- Click Save.
- Launch the game again from Lutris.
Common mistakes / notes:
- If you skip the “first launch” and immediately switch runners, you may miss the simple test of whether the base configuration starts correctly.
- Remember that runner selection is per-game: changing the runner in Yandere Simulator’s settings only affects that Lutris entry.

Step 6: How to Play (Basic Run Workflow + Updates)
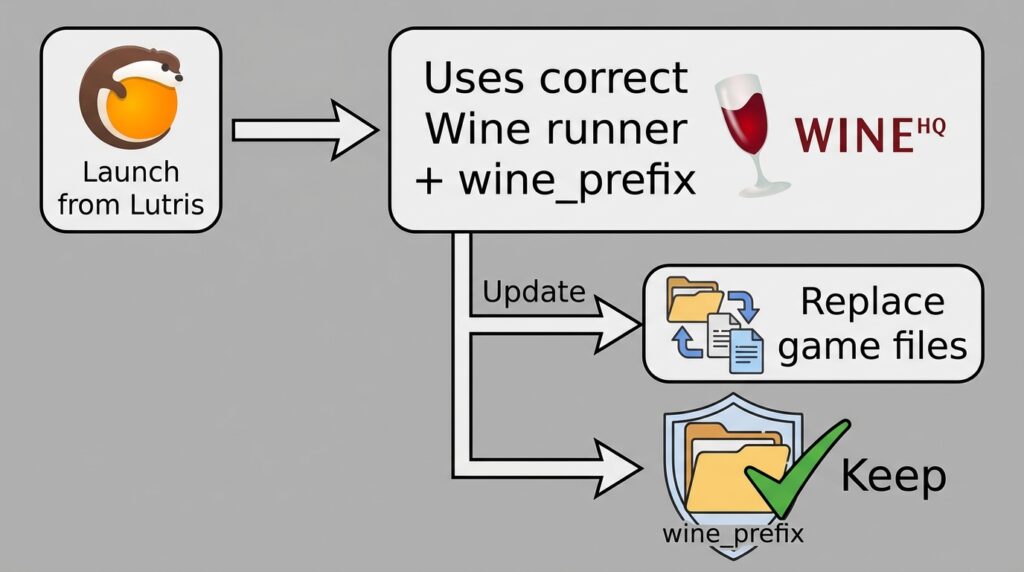
This step explains the day-to-day routine: always launch from Lutris so the correct Wine prefix and runner are used, and handle updates by replacing game files while keeping your prefix (if you want to preserve your configured environment).
Actions:
- Always start the game from Lutris (this ensures it uses the correct Wine prefix and runner you configured).
- When the game updates:
- Replace the extracted game files in your game folder with the new build files.
- Keep your Wine prefix folder (for example, wine_prefix/) if you want to preserve the environment you configured.
Common mistakes / notes:
- Launching the EXE directly (outside Lutris) can bypass the runner/prefix configuration you set.
- When updating, don’t delete the Wine prefix if you want to keep the same configured environment.